How to Install Multiple PHP Versions with Nginx on Ubuntu
April 2, 2024

Are you a developer or a system administrator looking to run different PHP versions on your Ubuntu server? Maybe you need to test your application across various PHP versions, or you have multiple projects that require different PHP environments. Whatever the reason, installing multiple PHP versions with Nginx on Ubuntu is simpler than you might think. Follow these step-by-step instructions to get started.
Overview
Step 1: Update Ubuntu Packages
Step 4: Configure Nginx to Use Different PHP Versions
Step 5: Test Configuration and Reload Nginx
Update Ubuntu Packages
Update your Ubuntu package list to ensure you have the latest versions available. Open a terminal and run the following commands:
sudo apt update && sudo apt upgrade -y
Install Nginx
You can install nginx by running below command:
sudo apt install nginx -y
Once Nginx is installed, you can start the service using below command:
sudo systemctl start nginx
Install PHP Versions
Ubuntu’s repositories might not have all the PHP versions you need. Fortunately, there’s a tool called Ondřej Surý’s PHP PPA, which provides multiple PHP versions for Ubuntu. Install the PPA by running:
sudo apt install software-properties-common -y
sudo add-apt-repository ppa:ondrej/php
sudo apt update
After adding the repository, you can install the desired PHP versions. For example,
To Install PHP 5.6:
sudo apt install php5.6 php5.6-fpm php5.6-mysql -y
To Install PHP 7.4
sudo apt install php7.4 php7.4-fpm php7.4-mysql -y
To Install PHP 8.1
sudo apt install php8.1 php8.1-fpm php8.1-mysql -y
You can verify the installation by checking sockets in /var/run/php/
ls -la /var/run/php/
Sample Output:

Some common extensions used by PHP applications.(Optional)
Make sure to replace 8.1 with the version you require.
sudo apt install php8.1-common php8.1-mysql php8.1-xml php8.1-xmlrpc php8.1-curl php8.1-gd php8.1-imagick php8.1-cli php8.1-dev php8.1-imap php8.1-mbstring php8.1-opcache php8.1-soap php8.1-zip php8.1-intl -y
Start PHP-FPM Services
PHP-FPM (FastCGI Process Manager) is an implementation of FastCGI, a protocol for interacting with a web server, which is designed to handle high loads and reduce the overhead of executing PHP scripts. It is typically used to improve the performance of PHP applications by allowing them to run as a separate process, rather than being run within the web server process itself.
Make sure php-fpm service is running.
Start php-fpm service (Make sure to replace 8.1 with the version you require. )
sudo systemctl start php8.1-fpm
sudo systemctl status php8.1-fpm
Sample Output:

Configure Nginx to Use Different PHP Versions
Now that you have multiple PHP versions installed, you need to configure Nginx to use them. You can use the /etc/nginx/conf.d/ directory to add configuration files for each PHP version.
sudo vi /etc/nginx/conf.d/php8.1.conf
Remember, you can use any name for the configuration files, but they should end with
**.conf**.
Inside the configuration file, specify the PHP version using the **fastcgi_pass** directive. For example:
location ~ \.php$ {
    include snippets/fastcgi-php.conf;
    fastcgi_pass unix:/var/run/php/php8.1-fpm.sock; # Change this to the appropriate PHP version
}
Below is the complete conf file sample:
server {
    server_name myphp.server.com;

    access_log /var/log/nginx/php8.1.access.log;
    error_log /var/log/nginx/php8.1.error.log;

    root /var/www/html;

    location / {
        index index.html;
        try_files $uri $uri/ =404;
    }

    location ~ \.php$ {
        include snippets/fastcgi-php.conf;
        fastcgi_pass unix:/var/run/php/php8.1-fpm.sock; # Change this to the appropriate PHP version
    }

    location ~ /\.ht {
        deny all;
    }

    location = /favicon.ico { access_log off; log_not_found off; }
    location = /robots.txt  { access_log off; log_not_found off; }

}
Save the file and repeat the process for each PHP version you have installed.
Test Configuration and Reload Nginx
Before you reload Nginx, it’s a good idea to test the configuration to ensure there are no syntax errors.
Run the following commands to test syntax:
sudo nginx -t
Sample output:

If the test is successful, reload Nginx to apply the changes:
sudo systemctl reload nginx
Verify PHP Version
To verify that Nginx is using the correct PHP version, create a PHP file in your web root directory and add the following content:
Create php info page.
cd /var/www/html
sudo vi info.php
Add the below config and save the file.
<?php
phpinfo();
?>
Restart Nginx
sudo systemctl restart nginx
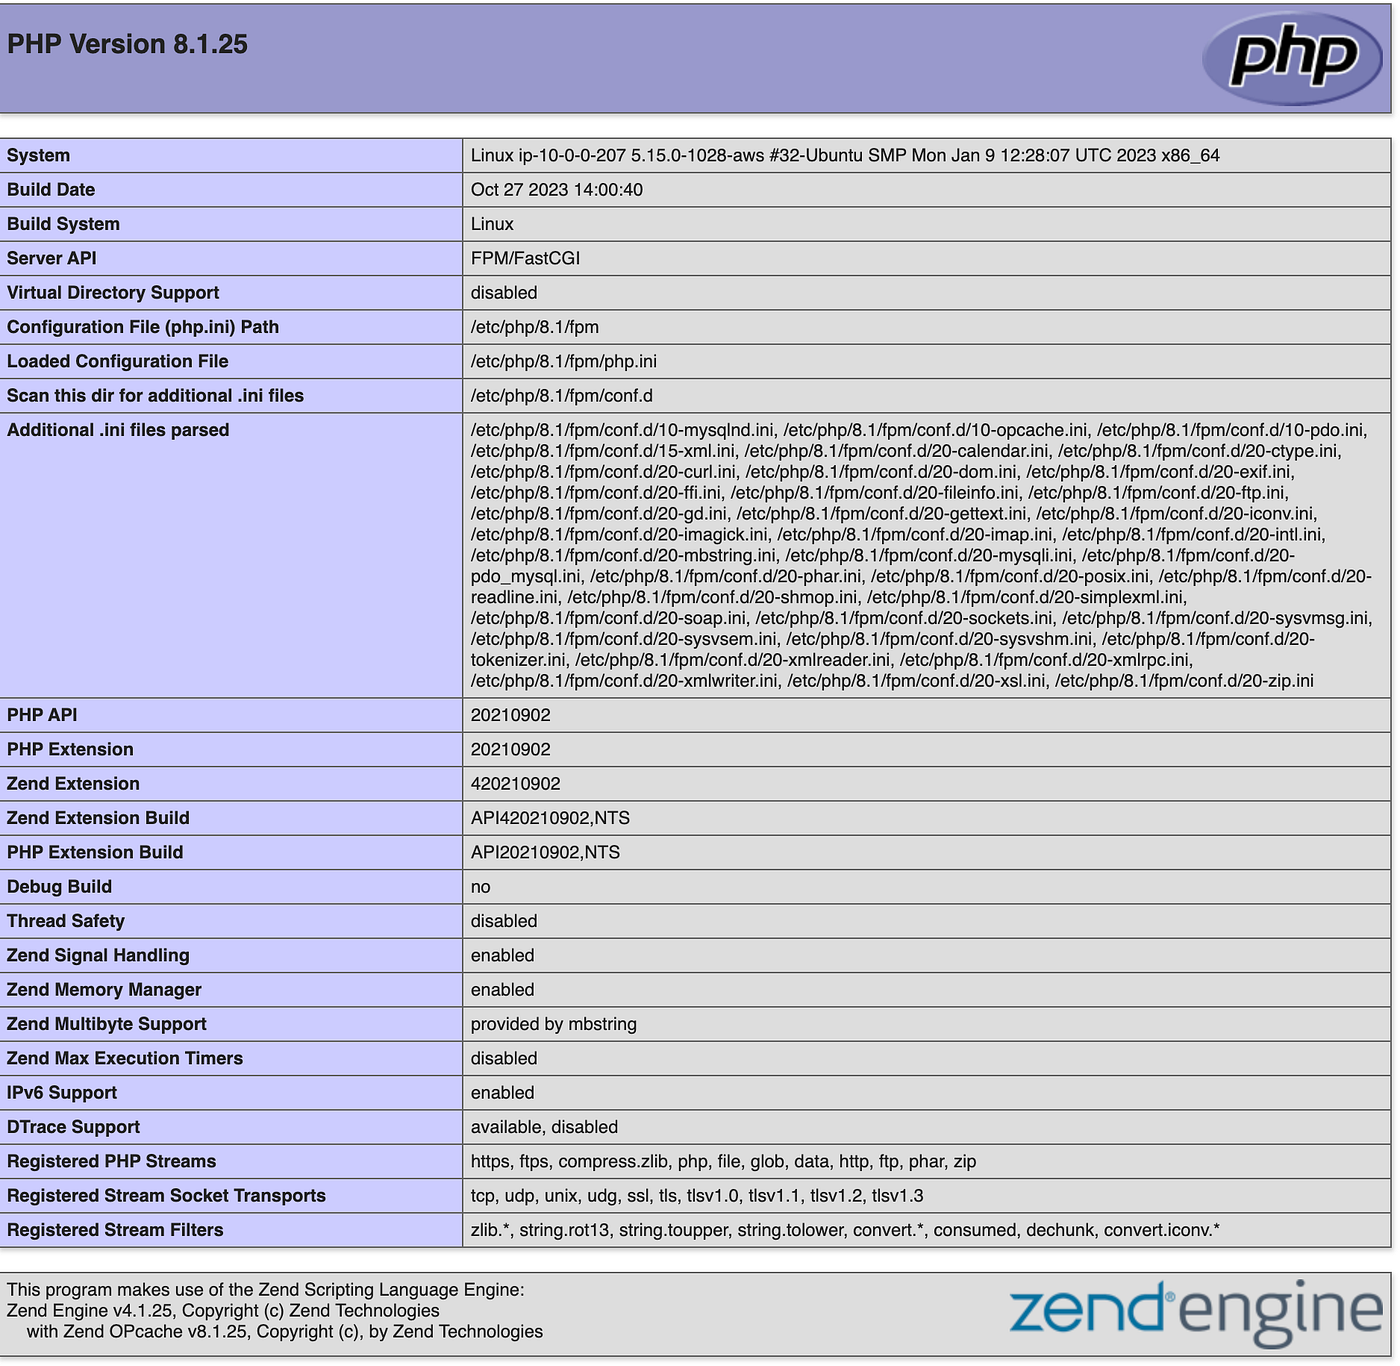
Now open your browser to verify PHP version. use the below URL format.
http://your_ip_or_domain/info.php
Sample Page:

To Test php5.6 and php7.4 or any other version, simply update the fastcgi_pass directive with PHP version and restart nginx.
Congratulations! You have successfully installed multiple PHP versions with Nginx on Ubuntu. You can now develop and test your applications across different PHP environments with ease.